|
|
il y a 2 ans | |
|---|---|---|
| electronics | il y a 2 ans | |
| firmware | il y a 2 ans | |
| hardware | il y a 2 ans | |
| .gitignore | il y a 2 ans | |
| README.md | il y a 2 ans |
README.md
OpenChrono
Chronograph for Airsoft use, released as Free Open Source hardware and software!
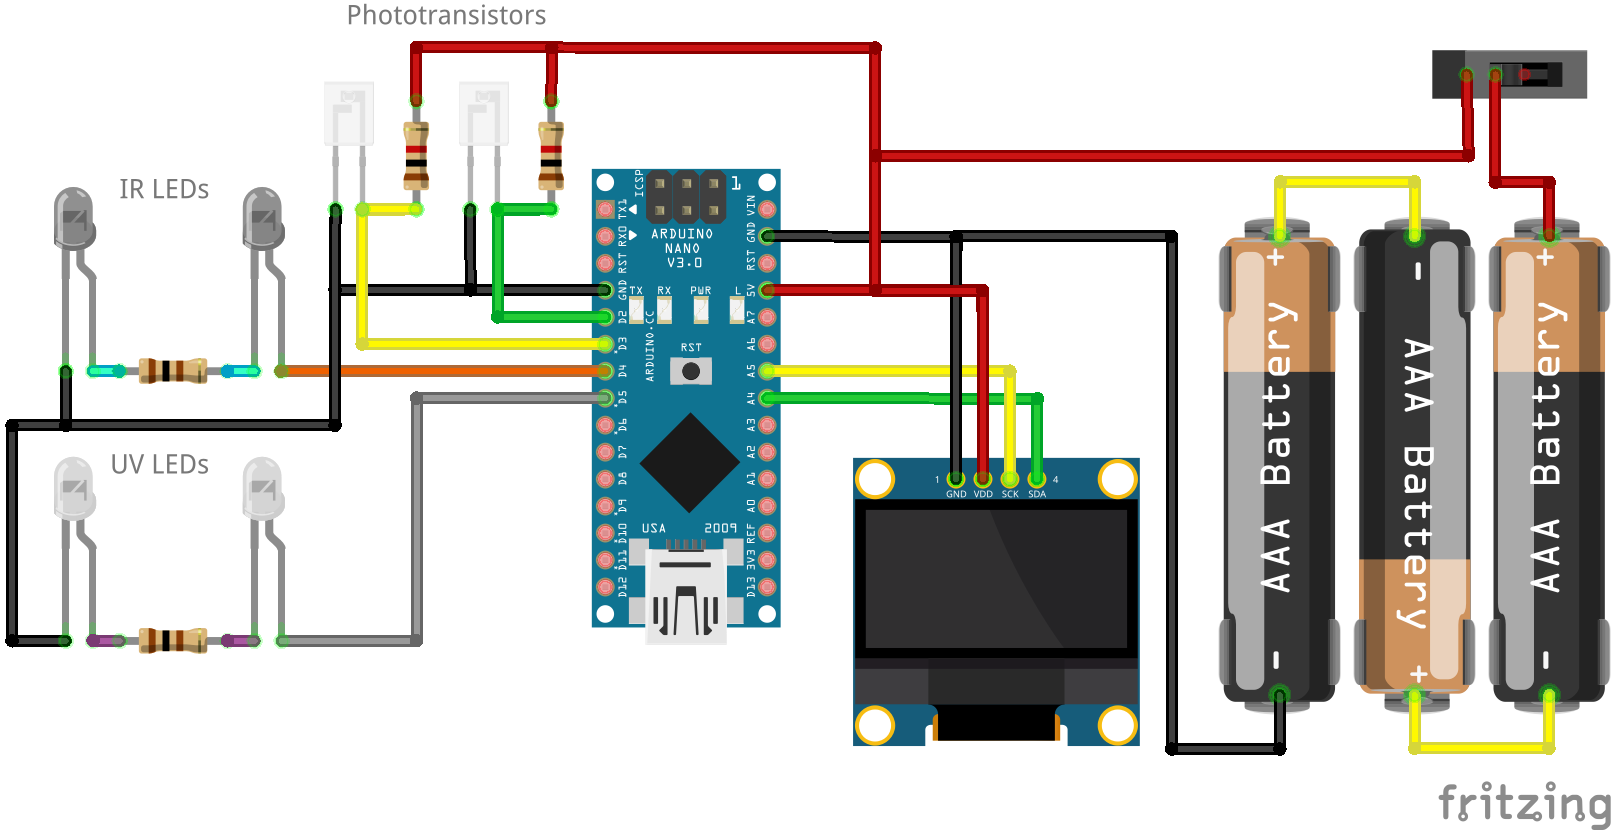
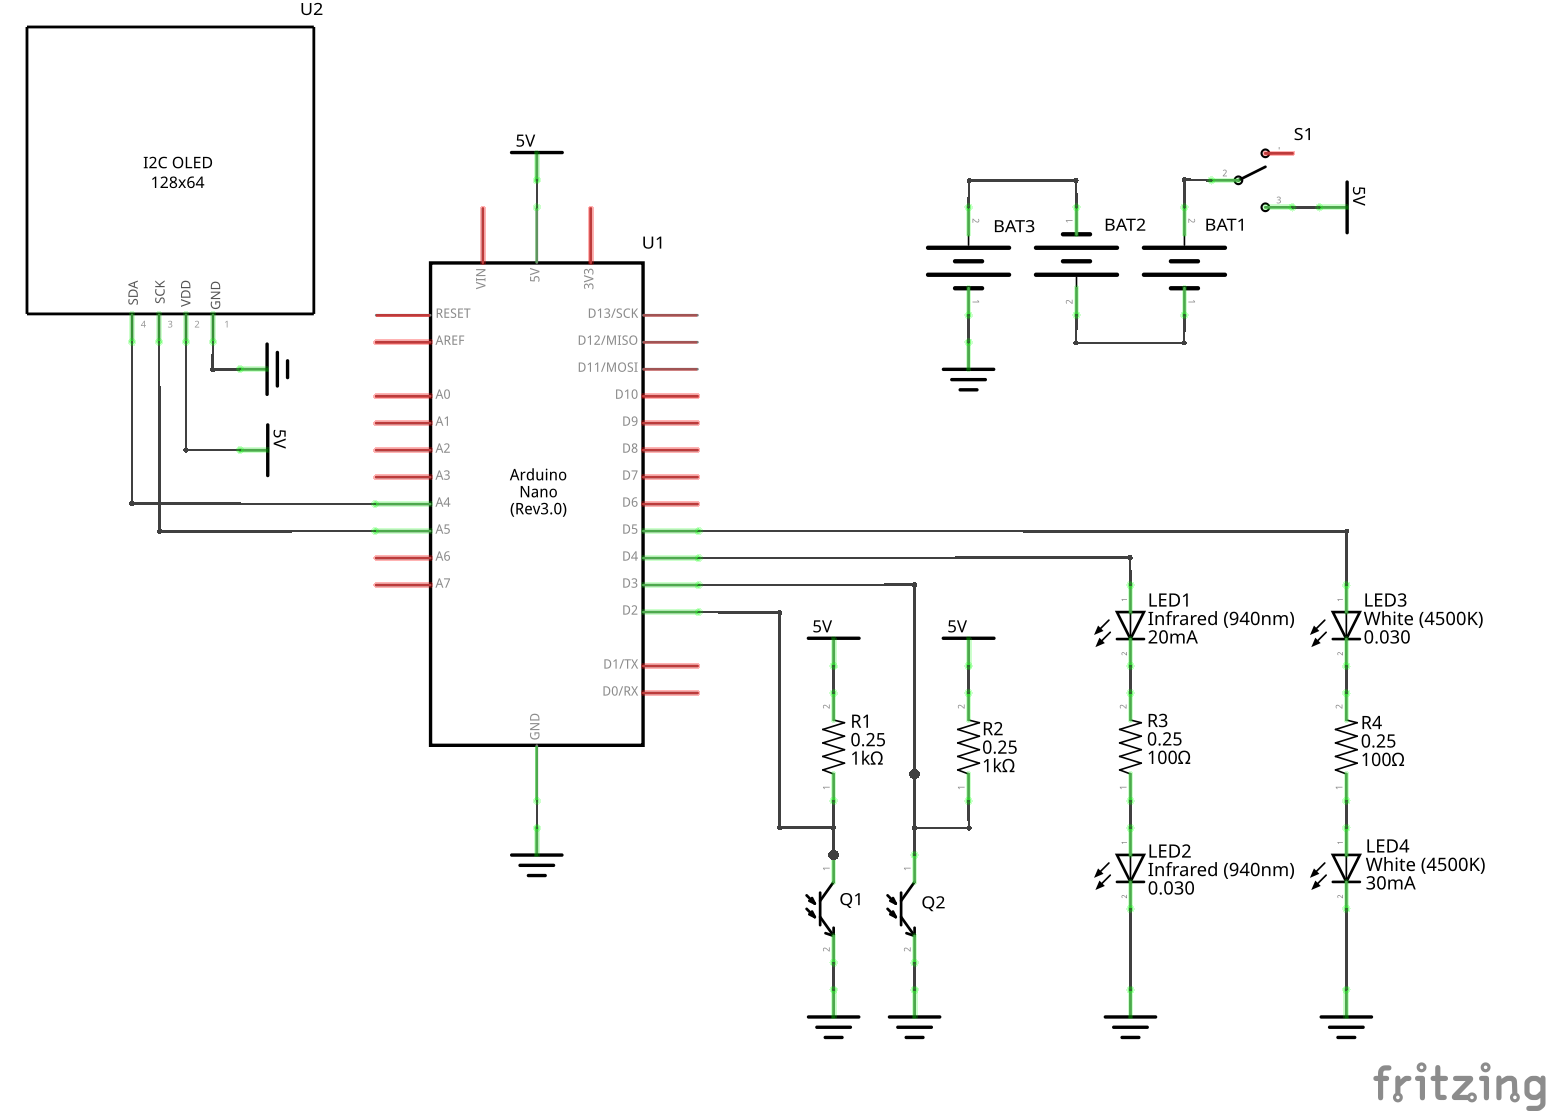
Uses a 3D printed housing to hold an Arduino, an OLED display, batteries and two photosensitive IR light barriers.
Fixed mounting on the front of the gun in the style of a silencer.
Can optionally also include UV LEDs to illuminate tracer BBs.
Hardware
Use the included OpenSCAD design file in hardware/openchrono.scad to render your own custom STLs that fit your use-case.
Required Parts
Besides some common stuff like soldering wire and hotglue you need the following parts to build this project.
| Description | Type | Count |
|---|---|---|
| Arduino Nano | 1x | |
| LCD 128x64 I2C | SSD1306 0.96” | 1x |
| Slide Switch | 1x | |
| IR Phototransistor | SFH 309 FA-5 | 2x |
| IR LED 3mm | 2x | |
| Resistor | 1k Ohm | 2x |
| Resistor | 100 Ohm | 1x |
| Screw | M2 10mm | 4x |
| Screw | M2.5 10mm | 2x |
| Screw | M3 16mm | 8x |
| Heatmelt Insert | M3 <= 10mm | 8x |
For the UV tracer option you also need the following parts.
| Description | Type | Count |
|---|---|---|
| UV LED 3mm | 2x | |
| Resistor | 100 Ohm | 1x |
You have different options for powering the project. My first version for testing uses a pre-made AA battery holder.
| Description | Type | Count |
|---|---|---|
| AA Battery | 3x | |
| AA Bat. Holder | 1x | |
| Screw (sunk) | M3 6mm | 2x |
The originally intended variant is a AAA battery holder printed into the model. I don’t have the terminals for that yet so it is not finished.
| Description | Type | Count |
|---|---|---|
| AAA Battery | 3x | |
| Bat. Terminal Neg. | 3x | |
| Bat. Terminal Pos. | 3x |
I’m also looking to design a LiPo version with charger included in the future.
Software
This project uses the U8g2 library by olikraus to draw to the I2C OLED display.
You can compile and flash the software using either PlatformIO or the standard Arduino IDE.
With the Arduino IDE install the U8g2 library using the Library Manager and then flash as usual.
For PlatformIO run something like the following command.
pio run -t upload --upload-port /dev/ttyUSB0
Replace /dev/ttyUSB0 with the port you are using.
Configuration
Take a look at firmware/OpenChrono/config.h.
This file contains all the settings you can change as a user.
The most important setting is SENSOR_DISTANCE, which is given from the 3D model of the case.
It is echoed when rendering the OpenSCAD design.
You can set BB_WEIGHT to the one you use most commonly, and BB_WEIGHTS to others interesting for you (BB_WEIGHTS should include BB_WEIGHT).
These values are used to calculate the energy in Joules.
Set PREFERRED_UNITS to what you would like to see in the 2D graph.
The range of speeds that can be measured is determined by TIMER_PRESCALER.
Take a look at the comment in firmware/OpenChrono/ticks.cpp for details.


